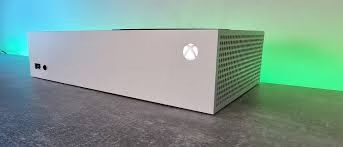
Xbox Series S Cleaning Guide
An accumulation of dust inside an Xbox Series S can lead to overheating, increased fan noise, and, in the worst-case scenario, hardware failure. While Microsoft officially recommends only cleaning the exterior, it is possible to open the console for a more thorough internal cleaning.
Here is a guide on how to disassemble and clean an Xbox Series S, including a warning about the risks involved.
Warning: Proceed at your own risk. Opening your console and performing an internal cleaning may void your warranty. It also requires careful handling of electronic components. If you are not comfortable with this process, it is best to stick to an external clean or seek a professional repair service.
Tools and Materials Needed:
- Torx T8 and T10 security screwdriver bits: These are essential for removing the specific screws used in the console.
- Plastic pry tools or guitar picks: These are useful for gently prying open the console’s casing without causing damage.
- Compressed air or a low-powered vacuum: These are used to blow or suck away dust from the components. Be careful with high-powered vacuums, as they can create static electricity that may harm the electronics.
- Anti-static brush or a clean, soft-bristled brush: An anti-static brush is the safest option for cleaning circuit boards and other sensitive parts.
- Microfiber cloths: For wiping down surfaces and cleaning the fan blades.
- Isopropyl alcohol (IPA) and lint-free wipes: These can be used to clean off stubborn grime or, if you’re doing a deeper clean, to remove old thermal paste.
Step-by-Step Disassembly and Cleaning Guide:
1. Preparation
- Power Down: Fully power down your Xbox Series S and unplug all cables, including the power cord, HDMI, and any USB accessories.
- Work Area: Place the console on a clean, well-lit, and static-free surface. A magnetic mat can be very helpful for keeping track of screws.
2. Remove the Outer Casing
- Locate the Screws: Turn the console so the back ports are facing you. There are two plastic covers on the rear of the console, near the ports. Remove these covers to expose two hidden screws.
- Remove the Back Screws: Use a T8 screwdriver bit to remove the screws you just exposed.
- Remove the Bottom Casing: With the screws removed, you should be able to slide the bottom casing away from the console’s body. Set it aside on a clean surface.
- Remove the Main Body Screws: Turn the console over and locate the seven green screws on the main body of the chassis. Use a T10 screwdriver bit to remove them.
- Separate the Chassis: Gently pry apart the two sides of the white plastic case to separate it from the internal chassis. Set the plastic case aside.
3. Clean the Components
- Clean the Fan: The fan is often the biggest collector of dust. Carefully lift the fan out of its housing. Use a microfiber cloth to wipe down the blades and use compressed air or a brush to clean out the dust from the fan’s motor housing.
- Clean the Heat Sink: The heat sink is a metal finned component that dissipates heat. Use a brush or compressed air to carefully clean the fins, ensuring you dislodge any dust build-up.
- Clean the Boards and Vents: Use a soft-bristled, anti-static brush to gently sweep dust off the mainboard and other components. Use compressed air to blow out any dust from the vents on the plastic casing. Be careful not to blow the dust deeper into the console.
- Consider a Deep Clean (Optional): If you are an experienced repair technician and your console has been running hot, you may consider removing the heat sink to clean and reapply the thermal paste on the CPU. This is a more advanced procedure and should only be attempted if you are confident in your skills.
4. Reassembly
- Reverse the Steps: Carefully reassemble the console by reversing the disassembly steps.
- Check Screw Placement: Ensure every screw goes back into its original location. The magnetic mat you used earlier will be a huge help here.
- Power On and Test: Once fully reassembled, plug in the power and HDMI cables and test the console to make sure it powers on and functions correctly.
A clean console will run quieter and more efficiently, helping to prolong its life and prevent performance issues.


Post Comment